Operating Instructions: go-e Charger Gemini & Gemini flex
Last updated:
You have recently had the go-e Charger Gemini installed by an electrician or have installed the go-e Charger Gemini flex yourself and would like to put it into operation.
In this blog post, we explain how to start up and operate your new go-e Charger.
Do you want to allow Integration of youtube videos?
Allows the playback of videos, that are hosted on youtube.com. By allowing this feature, you accept the privacy agreement of google.
1. Start Charging Your EV
Once your go-e Charger Gemini has been connected by an electrician or you have connected your go-e Charger Gemini flex to a red CEE socket or to another suitable socket using an original go-e adapter, the charging station - whether Gemini or Gemini flex - carries out a self-test as part of the initial start-up. The LEDs light up in rainbow colours.
The charger is then ready for operation after only a short time, about 5 seconds.
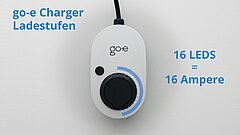
If you now start the charging process, it automatically begins with the charging power requested by the car. However, you can also change the charging current by pressing a button. Simply press the button on the go-e Charger briefly and the number of LEDs will change accordingly.
One LED stands for one ampere. The LEDs therefore indicate which charging level you have selected. For example, if 16 LEDs light up, that means 16 amps, which in turn means that you can charge your electric car with up to 11 kW, at least if your car can accept this current.
Note: The charging levels go in ascending order. So if you want to go back, for example, from 10 amps to 6 amps, just keep pressing the button until you reach 6 LEDs, i.e. 6 amps again.
Next, take your type 2 charging cable.
Plug one end of the cable into the type 2 socket of the charger and the other end into the socket of the electric car. Make sure that the type 2 plug of the cable is inserted all the way into the type 2 socket of the charger.
After only a few moments, the charging process will start.
2. The Charging Process
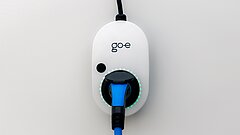
As soon as the charging process has started and the car is charging, you will see the LEDs on the go-e Charger turn clockwise. This is to indicate that charging is in progress.
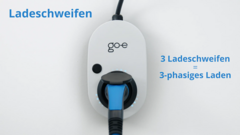
The LEDs now rotate in the form of charging tails.
The number of "tails" corresponds to the number of phases connected. 1 rotating tail therefore means 1-phase charging (230 V). 3 rotating tails mean 3-phase charging (400 V).
The speed of rotation and length of the tails indicate the amount of charging current.
LEDs as visual error display
The LEDs not only signal that your e-car is charging, they can also help with troubleshooting, as they also visually indicate errors. For instance, if there is a problem with the connection or the charging process.
If, for example, the LEDs do not light up at all despite the power connection, this means that there may be a problem with the fuse of the connection cable. In this case, you should check the overload fuse of the connection (show overload fuse). If it is not working, the power connection is probably not installed properly.
You can find out more about the various status indicators of the LEDs and their meaning in the operating instructions.
Let's take a look at 1-2 settings in the go-e Charger app that might help you charge your electric car.
3. go-e App Settings
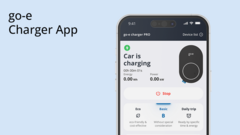
The go-e app provides you with useful information about the current charging process.
You can adapt the charging processes to your personal requirements and subsequently change the charging current via the app or, if you want, also change the phases, for example from three-phase to single-phase, in order to adapt the charging power to the production of your PV system.
If you want to set a specific time window for charging, you can do this easily via the go-e app, for instance.
You can find more information about the app configuration here.
Now let's take a quick look at how you can end the charging process.
4. End Charging
As soon as the charging process is complete, the LEDs light up green.
You can thus unlock and unplug the charging cable from the car, hang it back on the wall or take it with you, close the socket on the e-car again and drive off.
For reasons of theft protection, the cable remains locked in the charger's type 2 socket in the default setting after the charging process is complete until it is disconnected from the vehicle. However, you can also adjust this to your needs in the app.
End charging prematurely
If you want to interrupt charging prematurely, that's not a problem. The charging process can either be interrupted directly at the vehicle or in the go-e app.
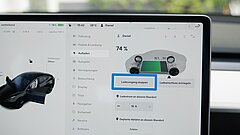
If you end the charging process directly at the vehicle, simply use the "cable release" function of the car.
Note, however, that the premature termination of the charging process works differently depending on the car manufacturer. With a Tesla, for example, the charging process must be interrupted in the vehicle via a setting on the display.
With the Renault ZOE, the charging process can be interrupted via a button on the remote control.
If you want to interrupt the charging process prematurely via the app, simply click on the large round button at the top of the app in the "Charging" tab.
That's it!

