go-e Controller Setup in the go-e App
You can set up the go-e Controller either on the go-e Controller display or in the go-e app.
Do you want to allow Integration of youtube videos?
Allows the playback of videos, that are hosted on youtube.com. By allowing this feature, you accept the privacy agreement of google.
However, for certain functions, such as controlling PV surplus charging or dynamic load management, the integration of the go-e Controller via the app is absolutely necessary. In this article, we will show you how to set up the go-e Controller in the app.
Do you want to allow Integration of youtube videos?
Allows the playback of videos, that are hosted on youtube.com. By allowing this feature, you accept the privacy agreement of google.
Set up go-e Controller or Add Controller that has Already been Set Up
First, open the go-e app.
If you have already set up a go-e Charger, you need to go to the device overview by clicking on the name of the device. If the go-e Controller was already set up, you would see it here in the device overview.
If you have not yet set up the go-e Controller, press the plus in the top right-hand corner.
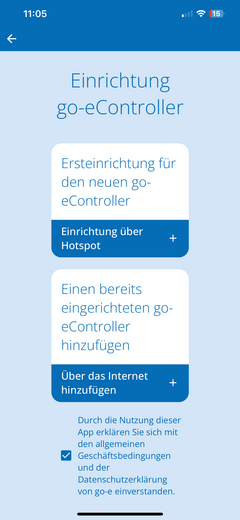
Now select either "Initial setup for the new go-e Controller" or "Add an already set up go-e Controller".
Let's take a look at the initial set-up first.
Initial Setup for the New go-e Controller
The first step is to set up the go-e Controller via the hotspot. It is important that you are close to the go-e Controller.
Note that some smartphones require you to disable mobile data and terminate active Wi-Fi connections.
To connect to the hotspot automatically, simply scan the QR code on the data card included with the go-e Controller, or connect to the go-e Controller manually in your phone's Wi-Fi settings using the hotspot password found on the go-e Controller data card. The process is similar to the setup for the go-e Charger.
Adding a go-e Controller that has Already been Set Up
If you want to add an already set up go-e Controller, select "Add an already set up go-e Controller" and enter the serial number of the Controller. You will also find this on the data card enclosed with the Controller. Then type in the password, which is either the default password on the data card or the one you entered during the initial setup, and click on "Connect".
Now the go-e Controller is set up in the app.
Let's take a look at the settings you can adjust for the Controller in the go-e Controller app.
App-Overview
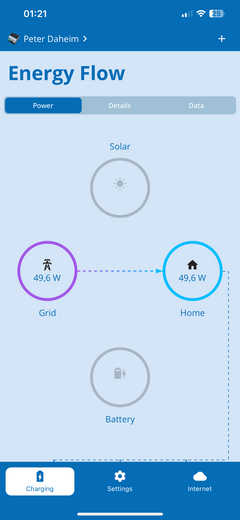
On the start screen in the Energy Flow tab, you can see the current power of the individual categories. The categories Solar, Grid, Home and Battery are displayed here by default. Of course, the appropriate values are only displayed if the setup has been carried out for them.
If you have set up your own categories, you only need to scroll down a little to see them.
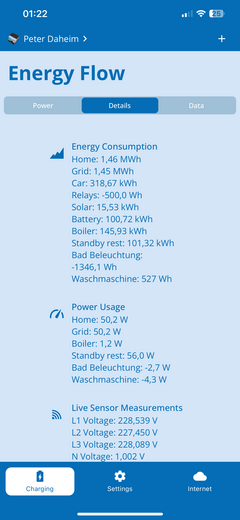
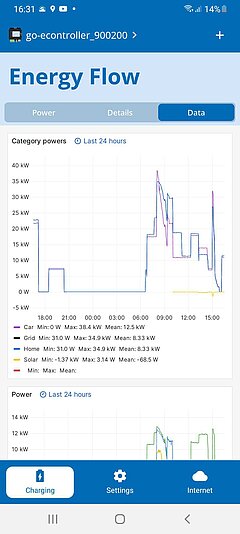
Click on "Details" to get a detailed overview of the individual categories and sensors.
In the "Data" tab you can see diagrams of your energy flows over the last few hours. It is also possible to export all data from the go-e Controller and view it on the PC.
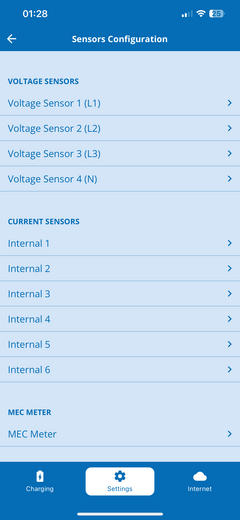
The voltage sensors L1 to L3 always measure the voltage of the connected phases and the current sensors Internal 1 to Internal 6 measure the current and the power.
In order for the go-e Controller to calculate the power correctly and for functionalities such as PV surplus charging and dynamic load management to work properly, you must ensure that you have set the correct voltage reference for all phases and that the correct categories and power factors are stored. Our video on the installation of the go-e Controller explains exactly what needs to be taken into account. In the following, we will only explain where you can find which settings in the app.
If you select one of the voltage sensors, e.g. voltage sensor L1, you will see all measured values of the selected phase.
If you have connected one or more phases of the power supply inverted, you can also change the voltage phase assignments here by selecting "Assigned phase".
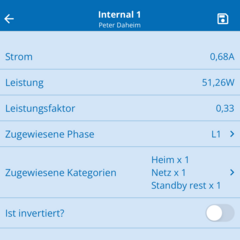
If you select one of the current sensors in the "Sensors" submenu, e.g. Internal 1, you will get to the data overview of the respective sensor.
If it happens that you have not connected a current transformer with the arrow pointing in the direction of the current, you can invert the sensor here using the slider.
Note that the power should always be positive when drawing from the grid. With a solar inverter or an AC battery, the power should be positive when feeding in. However, if the battery is being charged or the inverter has a higher standby consumption than it generates, the power may be negative. If no power is consumed, the power should be close to 0.
If you want to adjust an assigned load category or change the phase assignment, this is also possible here in the overview of the respective current sensor. This works similarly to the menu of the go-e Controller itself.
Clicking on "Custom categories" takes you to a submenu.
In this submenu you select which category the selected load, in our case Internal 1, should be assigned to. To do this, simply enter a number behind the respective category for the factor with which this current load is to be taken into account.
For example, if you measure your mains connection with a sensor, you should assign the factor 1 to this load in the category "Grid". If you do not have your own sensor on the load branch, i.e. the rest of your household, you should also assign a factor of 1 to the category "Home".
If you measure the current of a three-phase AC PV system with only one sensor on one phase, you must set the factor for the category "Solar" to 3 for the corresponding sensor so that the total power of the PV system can be displayed correctly. This works in this case because a three-phase inverter delivers the same power on all phases. So you save two sensor connections for other purposes.
Sensor Configuration
If you click on "Categories" in the "Settings" menu, you will get to the "Sensors configuration" view.
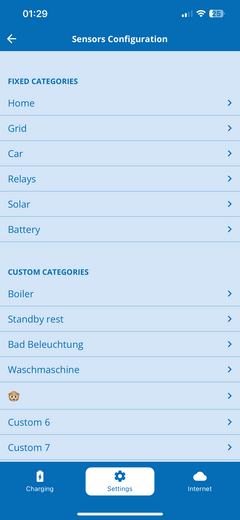
In this view, you can select individual categories and then assign them to different connected sensors. This is an alternative way to link loads and sensors.
In addition to fixed categories, you can also create user-defined categories, e.g. for the boiler or the lighting if you measure it via a sensor.
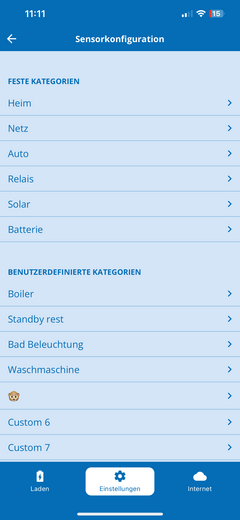
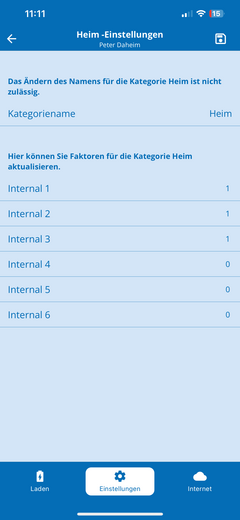
If you select one of the categories, e.g. Home, you can enter a number directly behind the name of the respective current sensor, i.e. Internals, for the factor with which the category is to be taken into account by the respective current sensor.
If you have already stored factors via the go-e Controller display or via the app setting "Sensors configuration", then there would already be numbers shown. You can also see this in our example.
With user-defined categories, you can even change the name of the category, i.e. assign the name "Boiler", if you measure this with a sensor.
Please note that, as always, you must save any changes you make in the app here in the top right-hand corner.
Time and Display Settings
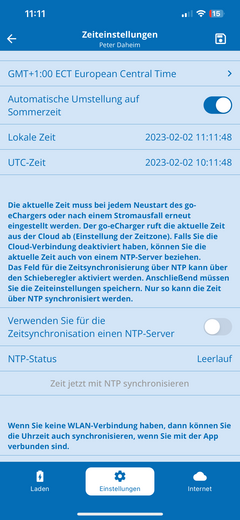
Advanced users can synchronise the time via an NTP server or the app. If the go-e Controller is connected to the go-e Cloud via the Internet, it will always have the current time. In this case, no settings are required at this point.
In the time settings, you can set the time zone and activate the automatic summer time changeover.
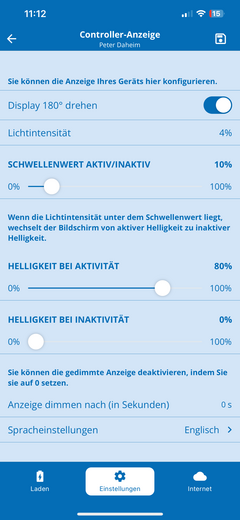
If you want to make display adjustments for the go-e Controller, go to Display Settings in the Settings menu. There you can, for instance, rotate the display, adjust the brightness of the display and much more.
Internet Settings
Under the menu item Internet, you can set all connection settings.
Besides WLAN or Ethernet, additional connections can be defined for experts and integrators. The status of all network connections can be called up via the "Network status" display.
In the sub-item "My go-e Controller" you can view information about the hardware.
There you will also find the serial number, for example. Furthermore, you can restart the go-e Controller or download the latest firmware.
Ok. Let's now take a look at the settings for PV surplus charging and load management.
PV Surplus Charging & Load Management
To do this, switch from the go-e Controller to the go-e Charger in the app by clicking on the picture or the name. This will take you back to the selection page with the list of available devices.
Now select the go-e Charger for which you want to adjust settings for PV surplus charging or load management.
After switching from your go-e Controller to the go-e Charger, you will reach its start screen with the "Charging" view.
Go to the "Settings".
If you want to check the connection or if your go-e Charger is not yet connected to your go-e Controller, select the "go-e Controller" setting option.
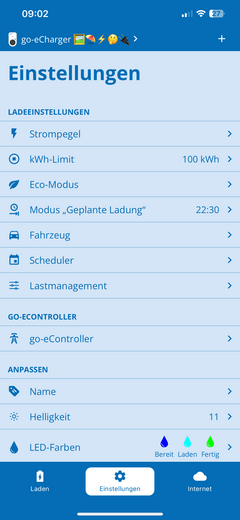
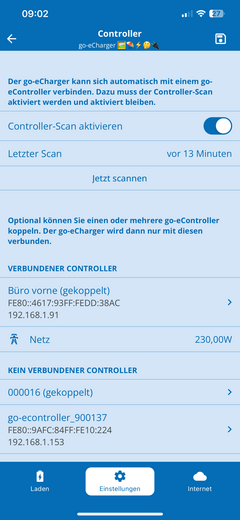
Already installed go-e Controllers can be automatically integrated into the go-e app here. Normally Controllers are detected automatically. Only if the Controller has just been installed or if you have switched off the automatic scanning function do you have to tap "Scan now". By the way, a Charger can only be connected to a single Controller, but the Controller itself can be connected to an unlimited number of Chargers at the same time.
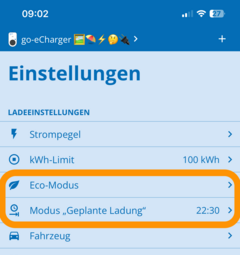
PV Surplus Charging in ECO mode
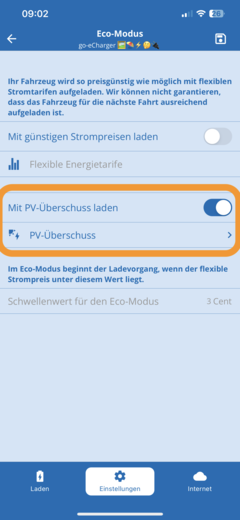
Let's take a look at the ECO mode first.
If you have an electricity provider with flexible electricity prices that is listed in the go-e app, you can combine ECO mode with the corresponding electricity tariff by activating "Charge with low electricity prices" using the slider.
However, this is not absolutely necessary for PV surplus charging.
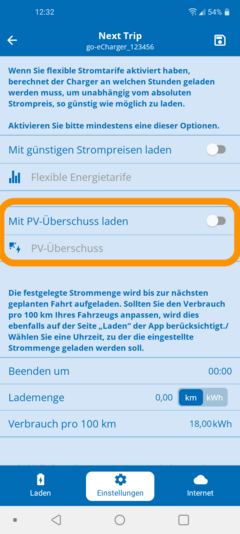
Now activate the slider "Charge with PV surplus" and then click on PV surplus below it to make the detailed settings for charging with solar power.
Here you can set the start level that must be reached by your PV system for the go-e Charger to start charging your electric car.
Once you have set the start level, select whether you would prefer to draw some electricity from the public grid or feed it in during the surplus charge - or whether you prefer a mixed form.
This is important because you can only charge your electric car at certain power levels, and in order to reach the next level, it is sometimes necessary to draw additional power from the public grid. If you choose to forego this grid power, some power would be fed into the grid in return. With single-phase charging, each stage is 230 watts, which in extreme cases you feed almost completely into the grid or draw from the grid. Depending on the setting.
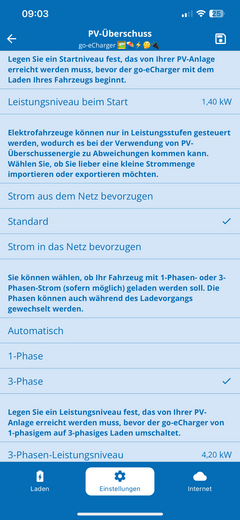
"Prefer power from grid" means that, in addition, a small amount of electricity is drawn from the grid if your PV system does not produce enough so that you can reach the next power level or the defined threshold value. You can therefore consume all of your solar electricity yourself, but you will always see a small amount of purchase on the electricity meter.
If you select "Default", you are opting for a mixed form. Your electricity meter will alternately run a little forward or backward during charging.
If you activate "Prefer power to grid", it means that as long as the generated surplus of the PV system is not sufficient to reach the next power level, a small amount of surplus power will be fed into the grid.
Then select whether you want to charge 1-phase or 3-phase, or whether you want the go-e Controller to make the decision for you and switch the phases automatically depending on the available power. The power level for 3-phase switching defines the surplus power your PV system must reach before the wallbox switches from single to three phases and vice versa. Typically, it should be 4.2 kW - this is the minimum charging power at 6 amps three-phase. Phase switching can make PV surplus charging much more efficient, as with single-phase charging even small surpluses of current can be used for charging.
Note: 3-phase charging is of course only possible if your go-e Charger is connected 3-phase and your car can charge 3-phase.
Next Trip Mode
If you want to be sure that the go-e Charger will charge your electric car with a certain amount of energy until dawn and you want to use PV electricity or cheap grid electricity from an electricity provider with flexible tariffs, then you should activate the "Next Trip Mode".
As you can see, you also have the option of combining the mode with low electricity prices.
Now activate the slider "Charge with PV surplus" and click on "PV surplus". As you can see, the PV settings are identical for the "ECO mode" and the "Next Trip mode".
Now we have to activate one of the modes. To do this, go back to the start screen and click on the mode symbol in the "Load" tab.
Now use the slider to activate either ECO mode or Next Trip mode, depending on which of these modes you have activated PV Surplus Charging in and whether you want to combine this with flexible energy tariffs.
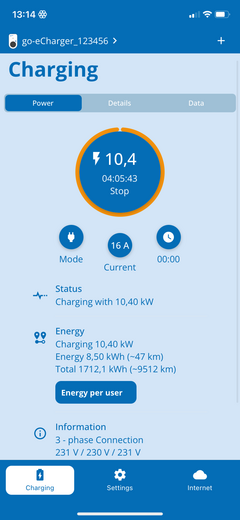
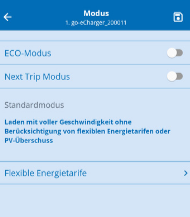
Now your go-e Charger begins with the PV surplus charging, provided of course that your PV system produces electricity that your other consumers in the house do not use.
By the way: You can also use ECO mode and Next Trip mode without a flexible electricity tariff. In ECO mode, the go-e Charger simply charges when there is a surplus of PV power available - possibly not at all. In Next Trip mode, the go-e Charger tries to wait as long as possible for surplus electricity, but then charges electricity from the grid as late as possible in order to reach your desired amount of energy.
Dynamic Load Management
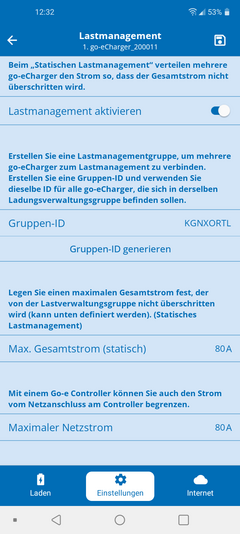
If you want to use dynamic load management, tap on "Settings" at the bottom of the app and then on "Load management".
With your go-e Controller you can combine static and dynamic load management.
Enter the value for dynamic load management in the line "Maximum grid current". This is the maximum current in amperes that your house can draw from the grid.
The go-e Controller will ensure that this value is never exceeded when charging your electric car in combination with the power demand of your other consumers. If necessary, the go-e Controller regulates the charging power downwards and then upwards again.
